Week 4: Class Wrap up
You have learned so much in only 3 weeks! These last 4 days, we'll go over a couple important things that haven't been covered yet, finish up websites, and do Blooket games with info we've learned.
If you feel like your website isn't "done" enough, don't worry! You will be taking your flash drive home and will be able to keep tweaking it if you want.
Thursday: Last Day!
You did it! You made it through Intro to Web Design.
Here's some badges you can add to your site if you like. This style of 88x31 pixel graphics were super popular on personal websites in the early days.


You can also make your own with the Piskel App.
If you didn't do the other tasks from this week, you can test them out today.
Challenge
If you're done with your website, here is a challenge for you. Copy and paste the source code from the first website ever made into a brand new file in VS Code. See if you can make it look better with HTML & CSS.
Wednesday: Adding Audio
Disclaimer
We talked about Copyright and Fair Use in Week 2. Technically you shouldn't be using full songs without permission, but it is common for indie web designers to have background music playing on their website. The following is for educational purposes only. (Don't sue me, Nintendo.)
The <audio> Tag
The current version of HTML has a built in audio tag that makes adding an audio player quite simple. You'll need a link to the audio file (like a .mp3) or you can have an audio file in your website folder.
Animal Crossing: New Horizons Original Soundtrack BGM Collection by Yasuaki Iwata; Yumi Takahashi; Kazumi Totaka; Shinobu Nagata; Masato Ohashi
Here, I'm linking an audio file from the Internet Archive. This website is MASSIVE and they have a boatload of audio files. To find public domain audio, you can filter the year it was made. Anything from 1930 or older is free to use, but the feds won't show up at your door if you use something newer. Probably.
<p style="font-size: x-small; line-height: 120%; width: 300px;">Song Name by Song Artist</p>
This code above is set to autoplay when someone visits your site. If you think that'd be annoying, you can just delete the word "autoplay" and people will have to click the play button themselves. "Loop" will make the song keep playing over and over. You can also delete this word if you just want it to play once.
Make sure you credit the artist! That stylized paragraph tag above is a way you can add a little caption.
That is literally the only code you need to add an audio player. The hardest part is picking a song.
Try it out
You can try using the <audio> tag today, but be considerate of your classmates. Keep your volume as low as you can while still hearing it. I have a few pairs of in-ear headphones if you want to use them.
Tuesday: Background Images & Custom Cursors
Background Images
Adding a background image is similar to changing the background color. You'll need to link the background image in your CSS. The image will repeat itself by default.
Here are some images you can download to your website folder to practice changing your background image.


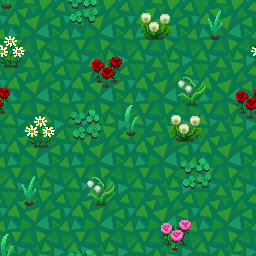







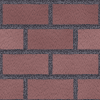


Text over images can be hard to read, so you'll probably want to set the background image to either your header or the body in your CSS if you're using the Kermit website template.
background-image: url(image.png);
}
NOTE: You can set images to not repeat like if you have one big background image, but we're just covering repeat backgrounds today. Look at your CSS Cheatsheet or w3schools for more options on background images.
Custom Cursors
Changing your cursor to a custom image is very similar to adding a background image in CSS. First you'll need small images with transparent backgrounds. You can use the default size of 32px in the Piskel App if you want to make your own.
You can use these icons below if you don't want to make your own. Save one or both (they're in pairs) to your website folder for this next part.


There are two ways we'll change the cursor. The first will be the default (auto) cursor. The second one will be when you hover over a link.
cursor: url(spatula-cursor.png), auto;
}
a:hover {
cursor: url(burger-cursor-hover.png), pointer;
}
Try these out! Remember: to save an image from a website, you right click or control click (on Mac) and select "Save Image As..." and select where you want to save it.
Monday: What are divs?
If you've been using the Kermit Website as a template for your website, you probably have noticed there are a lot of <div> tags. Divs (short for "division") are generic containers in HTML that can be defined with CSS. They are used to organize and group your content. Like most HTML tags, they're not very exciting until you style them with CSS. To style a div, you'll use a class attribute. This allows you to use different styles for different divs.
Codebox is the class attribute name for this div.
</div>
padding: 25px;
margin-top: 15px;
margin-bottom: 15px;
border: 0.5px solid #515000;
width: 80%;
display: block;
}
You can have an unlimited number of divs on your page. They can also be nested inside each other, but it's easy to get confused with all the identical closing </div> tags.
It's a good idea to put comments in your code so you can keep track of when things begin and end. They're invisible on the actual website, but it makes troubleshooting a lot easier in case something breaks.
<div class="codebox">
Here is the text inside the "codebox" div.
</div>
<!--end codebox-->
If divs are hard to understand, think of them like boxes. A div is a box for your content. You can stack boxes on top of each other. Or put boxes inside bigger boxes. That's essentially how divs work.

Test it Out!
Copy the CSS and the HTML for the "codebox" div above. You can change the name if you want, but change it in both places (but no space! CSS classes can't have spaces in their names. The only special character you can use for class names is a hypen.)
Bonus:
If you are working with the Kermit Website template, see what happens when you copy the div with the "container" class and paste it after the closing <div> tag.
If you have changed the background colors in the CSS, it should now look like you've got two "boxes" of content with space in between.